Welcome to sainsider.co.za, a comprehensive platform for anything South Africa. In this article, we will be talking about how to vinyl wrap a car. Kindly stay with us.
Overview
Vinyl has been used for bespoke lettering, logos, and decals since the 1950s, but full automobile wraps have yet to catch on. Then, in 1993, a simple, yet revolutionary, thought occurred to someone: why not vinyl wrap an automobile entirely? Germany required all cabs to be beige, but there was no mention of paint. Kay Premium Marking Films came to the rescue with a beige vinyl that made almost any car regulation-compliant in just a few hours.
Vinyl car wrap is a mixture of polyvinylchloride (PVC) polymer, from which the word “vinyl” derives, plus different additives that make it flexible, resistant to ultraviolet light, and colorful. These components are combined, then cast onto moving sheets before being baked and cured.
VINYL TODAY
The resulting vinyl sheet can be as thin as 2 mil thick, or two thousandths of an inch. Following the application of adhesive, vinyl car wrap sheeting can be sliced into smaller rolls for individual users or sent to printers for custom graphics as basic or complicated as you can conceive.
Simply said, vinyl car wrap is adhesive-backed plastic sheeting, but what can we do with a roll of plastic nowadays? We’ve come a long way from plain colors in the last few years, with inventors in the car wrap industry creating metallic, reflecting, matte, gloss, pearlescent, color-changing, even factory-matching and Pantone colors, not to mention beautiful, stunning, and intricate patterns and combinations.
PROS AND CONS – VINYL VS PAINT
If you’re thinking of changing the appearance of your vehicle with a paint job or a vinyl wrap, each has advantages. After all, a paint job has been the de facto standard for almost a century. To get a showroom finish, a paint job necessitates an expert’s touch, not to mention professional equipment, which raises the expense and slows down the process. The use of several or unusual colors, such as pearlescent or metallic finishes, adds to the time and cost. Graphics or bespoke designs necessitate the expertise of another specialist, and are often hand completed.
Such basic or custom paint jobs are likely to endure the life of the vehicle, if not decades. On the one hand, such permanence may be desired, but bizarre combinations might be divisive. Custom paint can significantly boost the value of a show car with a pedigree. Custom paint, on the other hand, can drastically lower its attractiveness — not everyone wants a pink skulls daily vehicle.
VINYL CAR WRAP TECHNOLOGY
Because of advancements in vinyl vehicle wrap technology, totally changing the look of your automobile is no longer prohibitively expensive, especially if you plan on doing it yourself. Professional vinyl car wrapping can cost as much as a paint job, but with patience and a steady hand, even a whole car cover can be completed by a do-it-yourselfer. In truth, the tools required are readily available and do not necessitate any particular licenses, training, or experience. Basic color changes, even numerous colors, don’t add much to the overall cost of the project, but special graphics, printing, or finishes may raise material costs. Nonetheless, the finished product might be exceptionally beautiful.
Vinyl car wrap’s basic nature lends itself to temporary applications. A great automobile wrap can last five to seven years, possibly ten years, if properly cared for. This may be problematic for long-term use, yet it may be ideal for certain drivers. Maybe you’ll want to change the design again in a few years, or maybe you’ll want to sell the car — little old ladies might not like those oh-so-metal graphics. In either case, removing vinyl car wrap needs simply a few basic equipment and supplies and has no negative impact on the original finish. In fact, the original paint job will be superior than one of comparable vintage since vinyl car wrap blocks paint-damaging UV light, preserving your vehicle’s resale value.
How To Vinyl Wrap A Car
If you’ve ever tried to apply vinyl lettering or graphics to your automobile, you know how tough it can be, even if you prepare the surface and yourself properly. Tears, bubbles, stretch marks, and wrinkles may have convinced you that a full vinyl car wrap requires professional installation. Much has changed, including more robust vinyl, improved adhesives, and air-release technologies. Even a do-it-yourselfer can achieve excellent results. Are you ready to begin?
PREPARING TO WRAP YOUR CAR
1. Think about your canvas, or the surface you’re wrapping. Is the paint and body work smooth? Minor scratches are unaffected, but chips, dents, gouges, and rust can cause issues with vinyl wrap. If the wrap adheres to the flaw, it will significantly improve its visibility. If the wrap does not adhere to the fault, it will bubble or break, resulting in a ruined wrap job. Before wrapping your car, take care of these flaws.
2. Select a location. A medical research cleanroom is not required, but a clean and regulated environment will keep dust out from under the wrap. Dust, debris, and bugs, like paint and body flaws, will degrade your finish. Sweep, vacuum, and mop if necessary, then close the doors to complete a fantastic vinyl wrap project.
3. On a warm day, go to work. The temperature of vinyl and vinyl adhesive is critical. Both the vehicle and the wrap should be at the same temperature, which should be around 68 °F (20 °C). When it becomes colder, the vinyl becomes brittle and may tear. Hotter, and the glue may activate too aggressively, making smooth installation impossible. To keep an eye on things, use a non-contact infrared thermometer. It may be a good idea to schedule the job for a different time of day or to allow everything to adapt for a few hours before beginning.
4. Gather your tools, materials, and supplies. A 25-foot roll of 60-inch wide vinyl wrap is required for the average automobile. Narrower rolls are available, however doing so will necessitate sewing a seam, which is a difficult task for a novice. Grease and wax remover, a general cleaner, 70% or 90% isopropyl alcohol, lint-free cloths or towels, squeegee, utility knife, cutting tape, heat gun, infrared thermometer, and cotton wrap gloves are also required. A tidy worktable keeps everything off the floor and decreases the possibility of dust accumulation. This is an excellent project to do with a friend to hold larger sections of vinyl wrap and to provide moral support.
SURFACE PREPARATION & PLANNING
5. You should clean your car. Non-wax car wash treatments, such as Turtle Wax MAX Power Wash or Turtle Wax Snow Foam, leave a clean surface for vinyl wrap to adhere to. Then, using isopropyl alcohol and lint-free cloths, clean the entire surface.
6. Remove any impediments from the wrap surface. Yes, you can wrap around an emblem, mirror, door handle, antenna, or headlight, but doing so significantly increases the effort and time required to get a nice vinyl wrap finish. By removing impediments, you can save a bottle of ibuprofen. Reapply alcohol to the surrounding areas to eliminate any remaining fingerprints or dust.
7. Measure each area you intend to wrap, plus a few inches for handling. Make a diagram of your car’s body panels and take measurements for later. Measure twice, add a small amount, and cut once. Remember, after you’ve chopped it off, you can’t add it back on! You’ll need to sew a seam if a panel is close to or broader than your widest vehicle wrap. Don’t try to wrap a 60-inch hood with 60-inch wrap — you’ll fall short.
LAYING YOUR FIRST SHEETS OF VINYL
8. If this is your first vehicle wrap project, begin with smaller, flatter areas to gain confidence and momentum before tackling a large roof or contoured hood. Using your sketch and measurements, calculate how much material to cut with a utility knife.
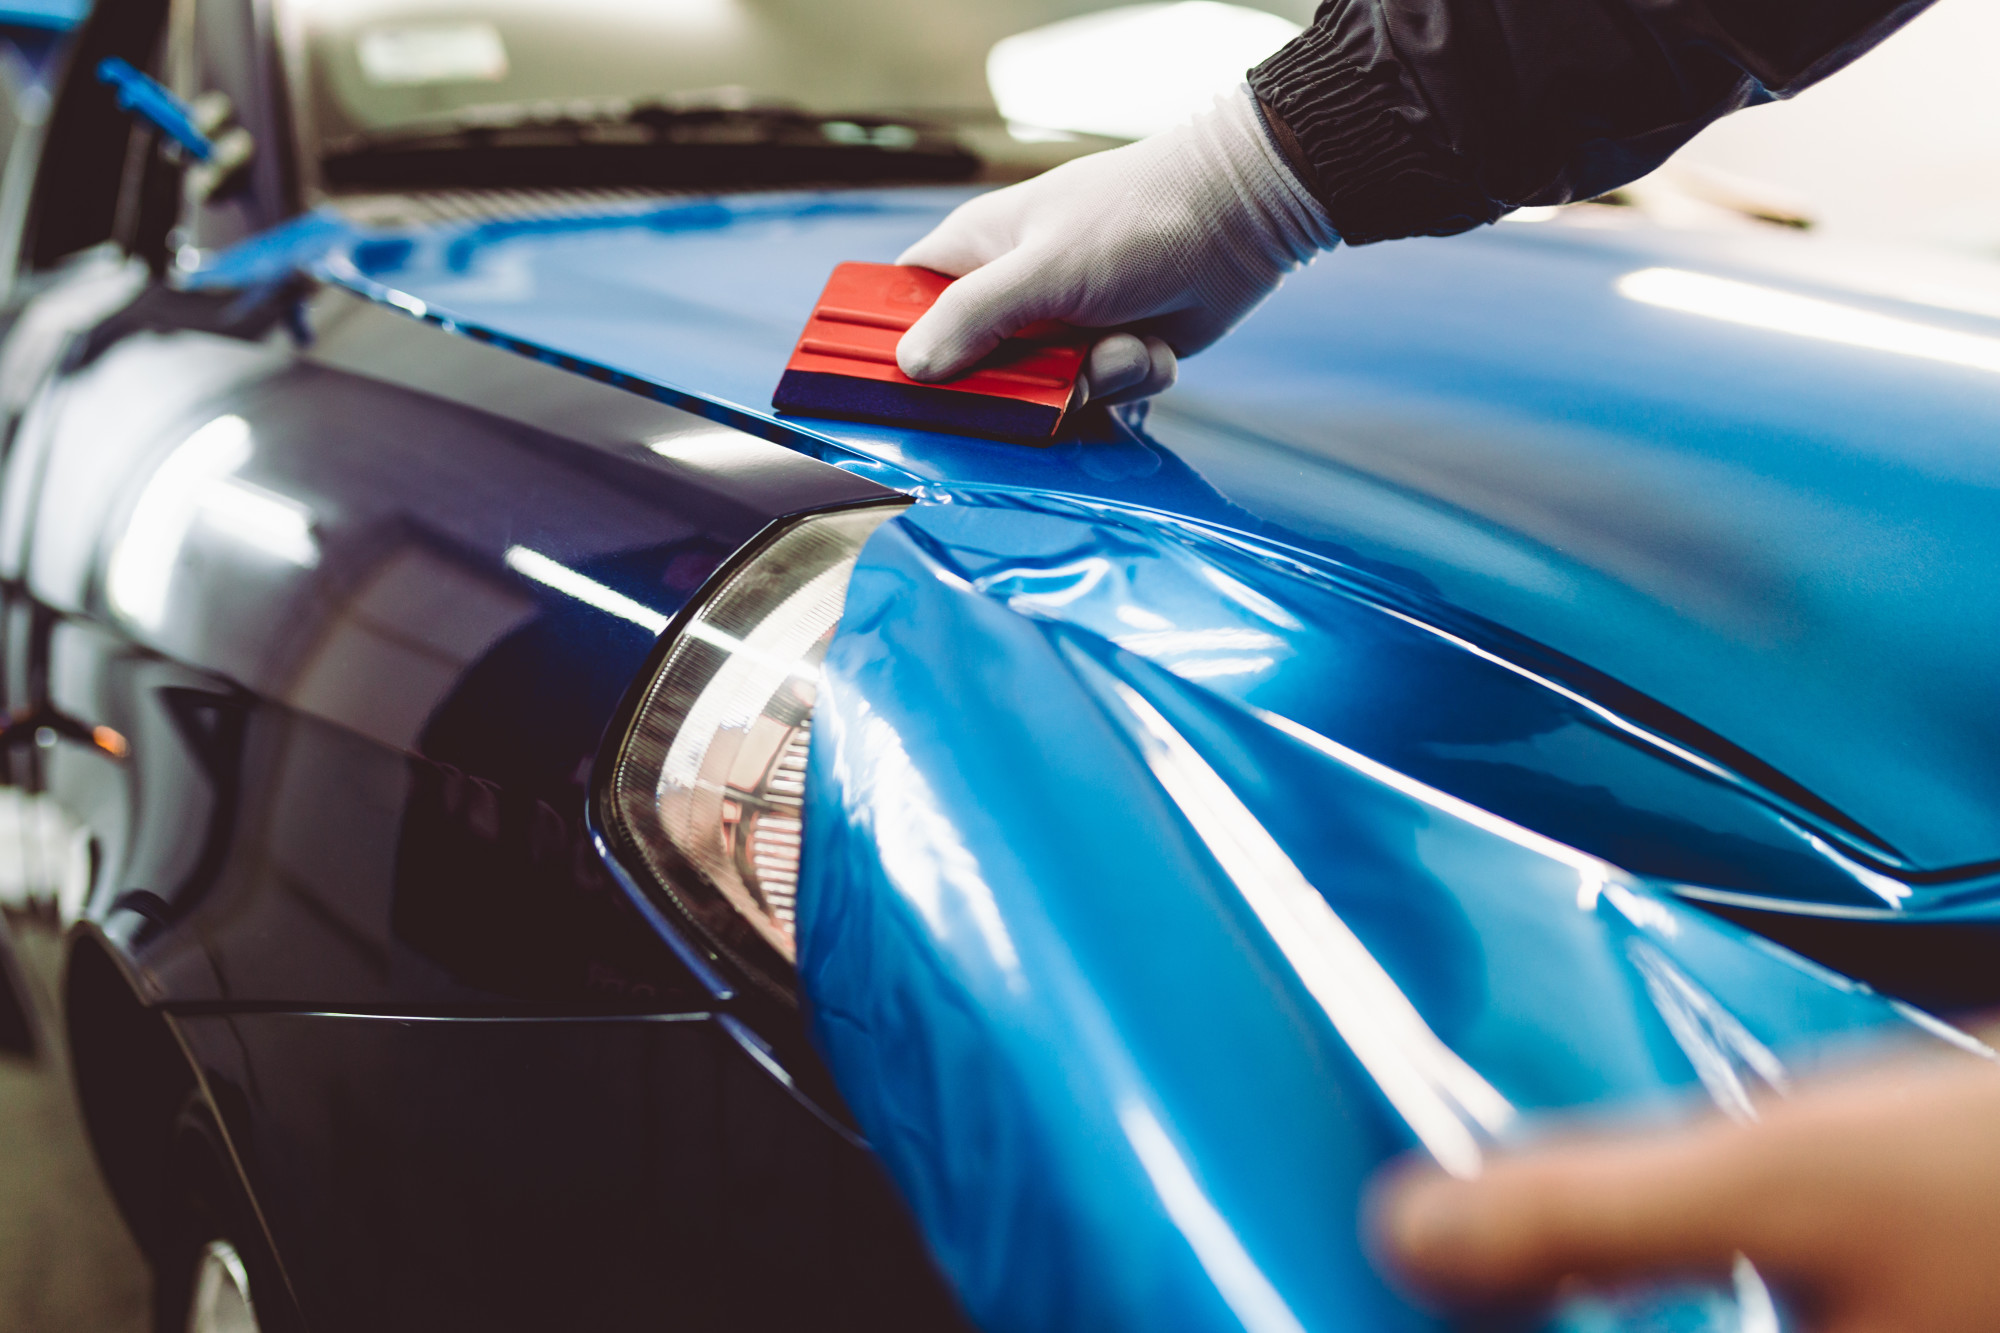
9. Holding the vinyl in the air with cotton gloves on, remove the backing paper while maintaining even strain on the wrap. This aids in the reduction of wrinkles and creases. Lay the vinyl wrap over the panel with care, leaving excess material around the borders to manipulate.
10. Gently press the vinyl into the center of the panel while maintaining tension on the remainder of the sheet. Begin at the middle and work in overlapping strokes toward the panel’s edges with the squeegee. This will drive air out of the panel and temporarily bond the vinyl to it.
PRESSING OUT AIR & WRINKLES
11. Curved surfaces can be particularly difficult since they force a two-dimensional object to conform to a three-dimensional surface. If you notice creases or bubbles as you work, gently peel back the vinyl and stretch it into position with heat (no more than 120 °F (80 °C) and strain. Work your way back out from the center to the edges using the squeegee. The same issues arise when covering other things such as mirrors, wheels, or interior panels. When fitting to curved surfaces, be careful to get the stretch just right.
12. Making seams can also be difficult, but there are a few solutions. The most straightforward method is to simply overlap one piece of vinyl over another, which requires careful alignment but no cutting. Kevlar cutting tape is a fantastic technology that produces beautiful stitches without the use of a blade. Snap knives are the final option, with a sharp edge to eliminate snagging and a light touch to avoid damaging the underlying paint.
EDGING AND FINISHING
13. Wrapping the edges of the panels is the first step in achieving a nice finish. Trim superfluous material to within a quarter-inch (2-3 mm) of the edge with the utility knife – larger margins are bad. To activate the adhesive, use the heat gun to evenly heat the edges of the panel and vinyl wrap to at least 212 °F (100 °C). Check the temperature with a thermometer to ensure even heating. Seal the edge of the vinyl to the panel with the squeegee and your fingertips. If you’re heating the vinyl to get it around a sharp curve, let it cool before trimming.
14. Once the corners and edges are sealed and set, use the heat gun to get at least 212 °F on the rest of the panel or piece. This activates the glue on the remaining vinyl, ensuring a long-term bond. To securely adhere the vinyl wrap to the surface, use your hands and a squeegee. At this point, bubbles may occur, but they may be safely punctured with a pin or utility blade and squeezed down with your fingers. Use the thermometer once more to ensure even heating. Allow at least 12 hours for the adhesive to completely set.
Thank you for reading our todays topic on how to vinyl wrap a car. we hope to see you again.